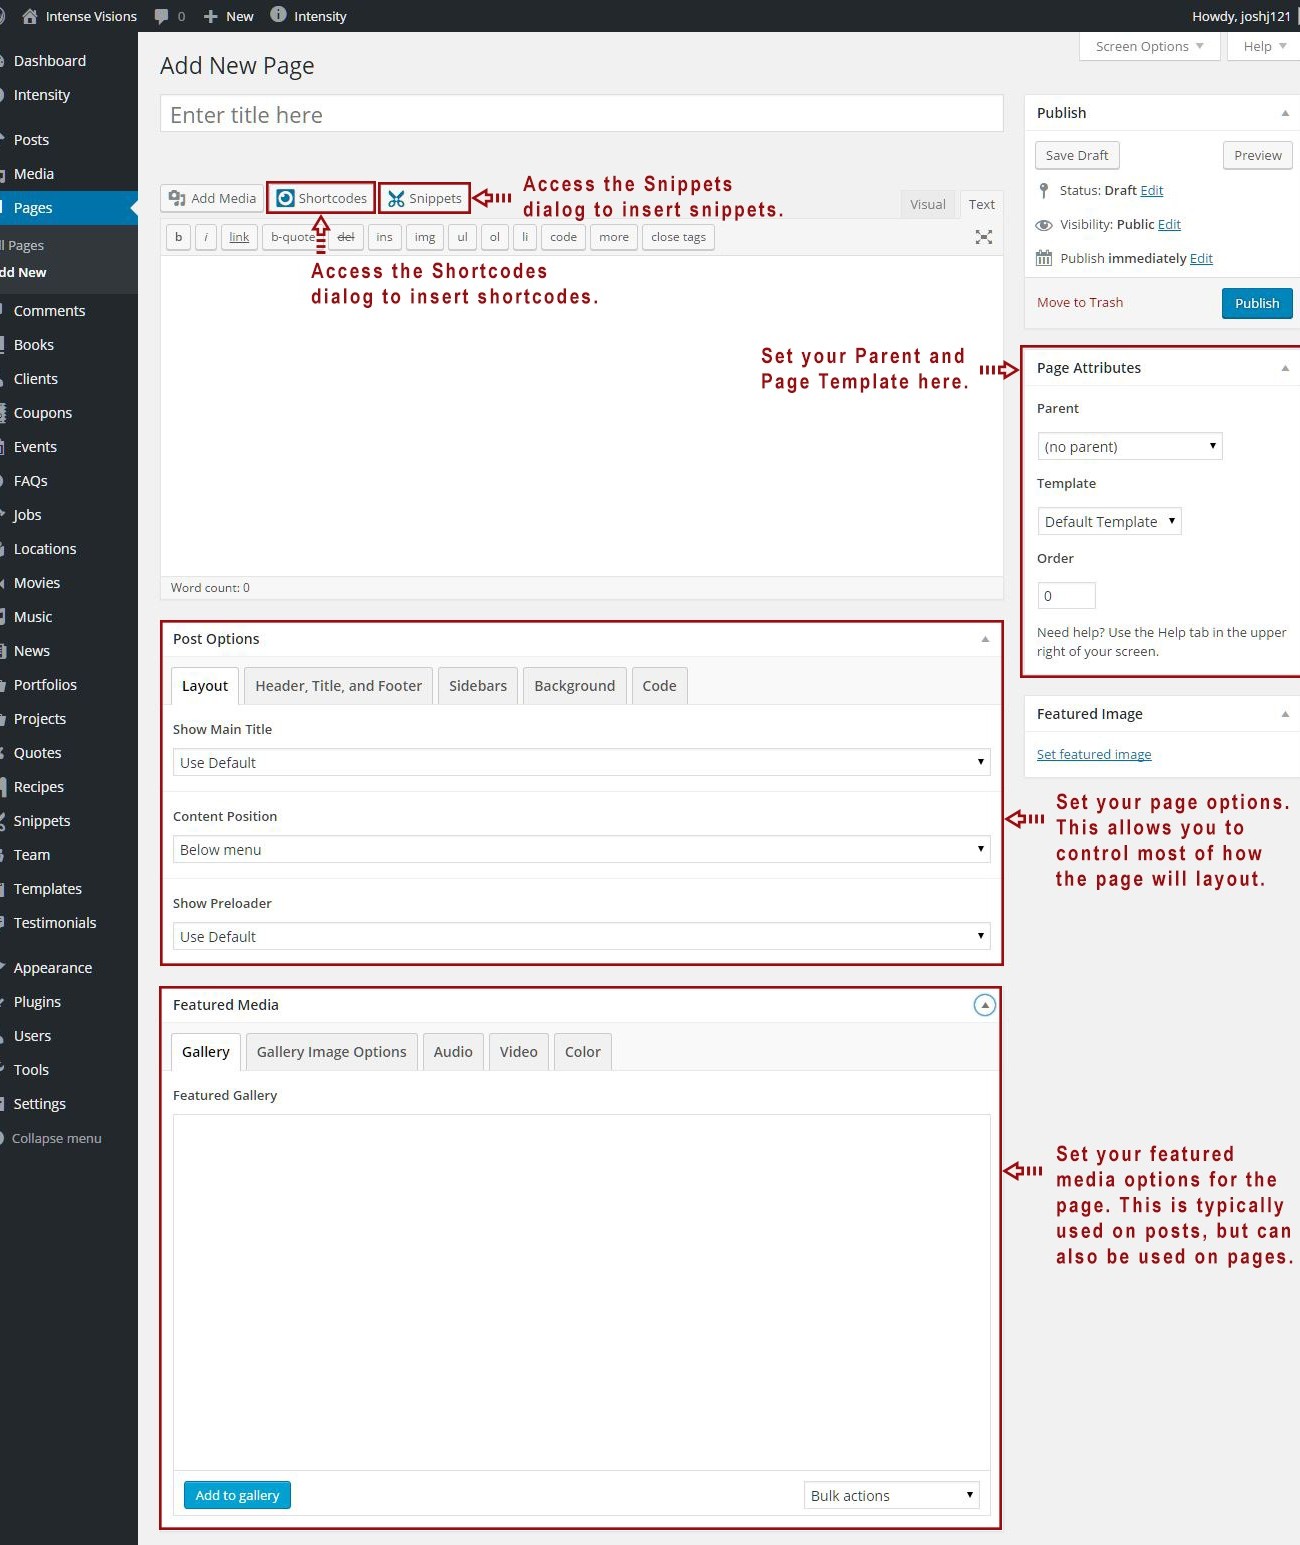
Input a new name for your page, then find the Page Attributes box on right side.
Set your Parent page. It’s usually set to No Parent.
Set your page template from the Template dropdown list. See list of page templates below.
Content for your page goes in the editing field, use the Visual or Text editor. Page content is mainly built using Shortcodes. See the Shortcodes section for how to use them.
Page Sections
Snippets – Access the Snippets dialog to insert snippets.
Page Attributes – Set your Parent page and Template. The Parent is usually set to “(no parent)” and the template is normally set to “Default Template”.
Post Options – This section allows you to control much of the layout of your page. Set portions of your page pertaining to layout, header, footer, title bar, sidebars, background, and post/page specific code.
Featured Media – Add a gallery to your page and set the options or add audio or video for the featured item as well. These settings are typically used on Posts, but can also be used on Pages.
Post Options Metabox
The Post Options metabox controls a number of aspects on your page/post. You can control the layout, header, title, footer, sidebars, background, and any post/page specific code.Header
Title
Body
Footer
Sidebars
Background
Comments
Extras
Featured Media Metabox
The Featured Media metabox allows you to set the featured media to be shown on the page and also how the media is shown.Gallery
Gallery Image Options
Audio
Video
Color
If the custom post type that you are looking for does not show in the WordPress admin menu, the custom post type may not be active. If this is the case, go into the Intense admin options (Settings->Intense), then to the Custom Post Types tab and make sure that the custom post types that you want to be active are properly checked in the “Active Custom Post Types” list and then save the options.
The list of the included Custom Post Types is to the right (or below on mobile devices). If you want to jump to the screenshot and metabox options information for one of the custom post types, simply click on the name.
List of CPT’s (click to view)
Books Custom Post Type

Book Options
Clients Custom Post Type
Client Options
Coupons Custom Post Type
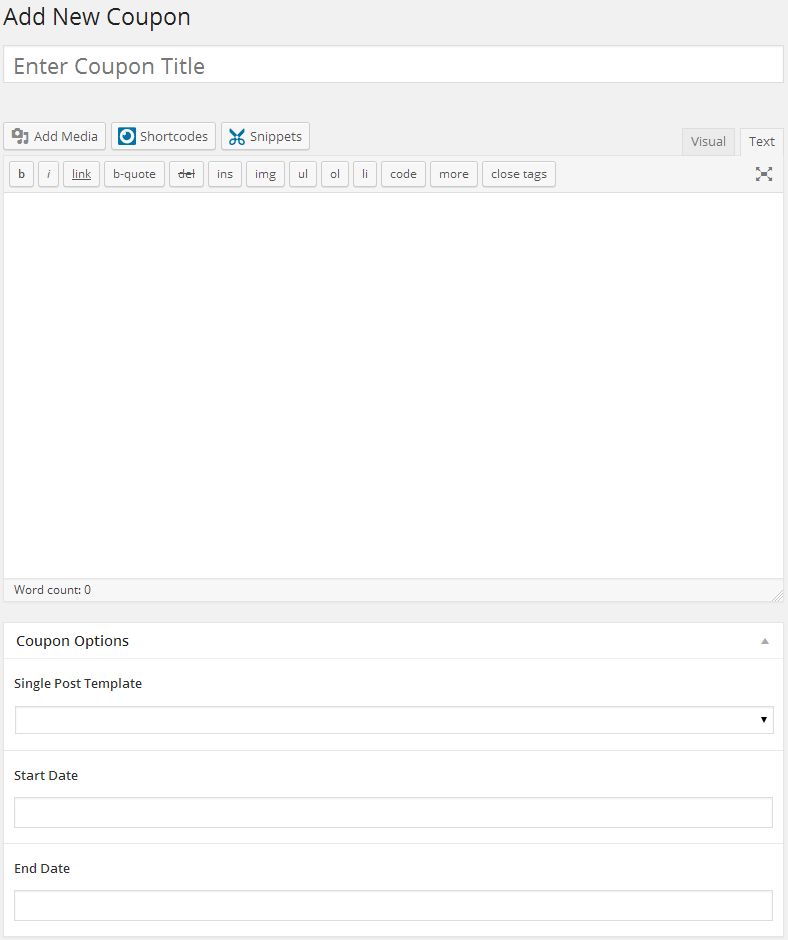
Coupon Options
Events Custom Post Type
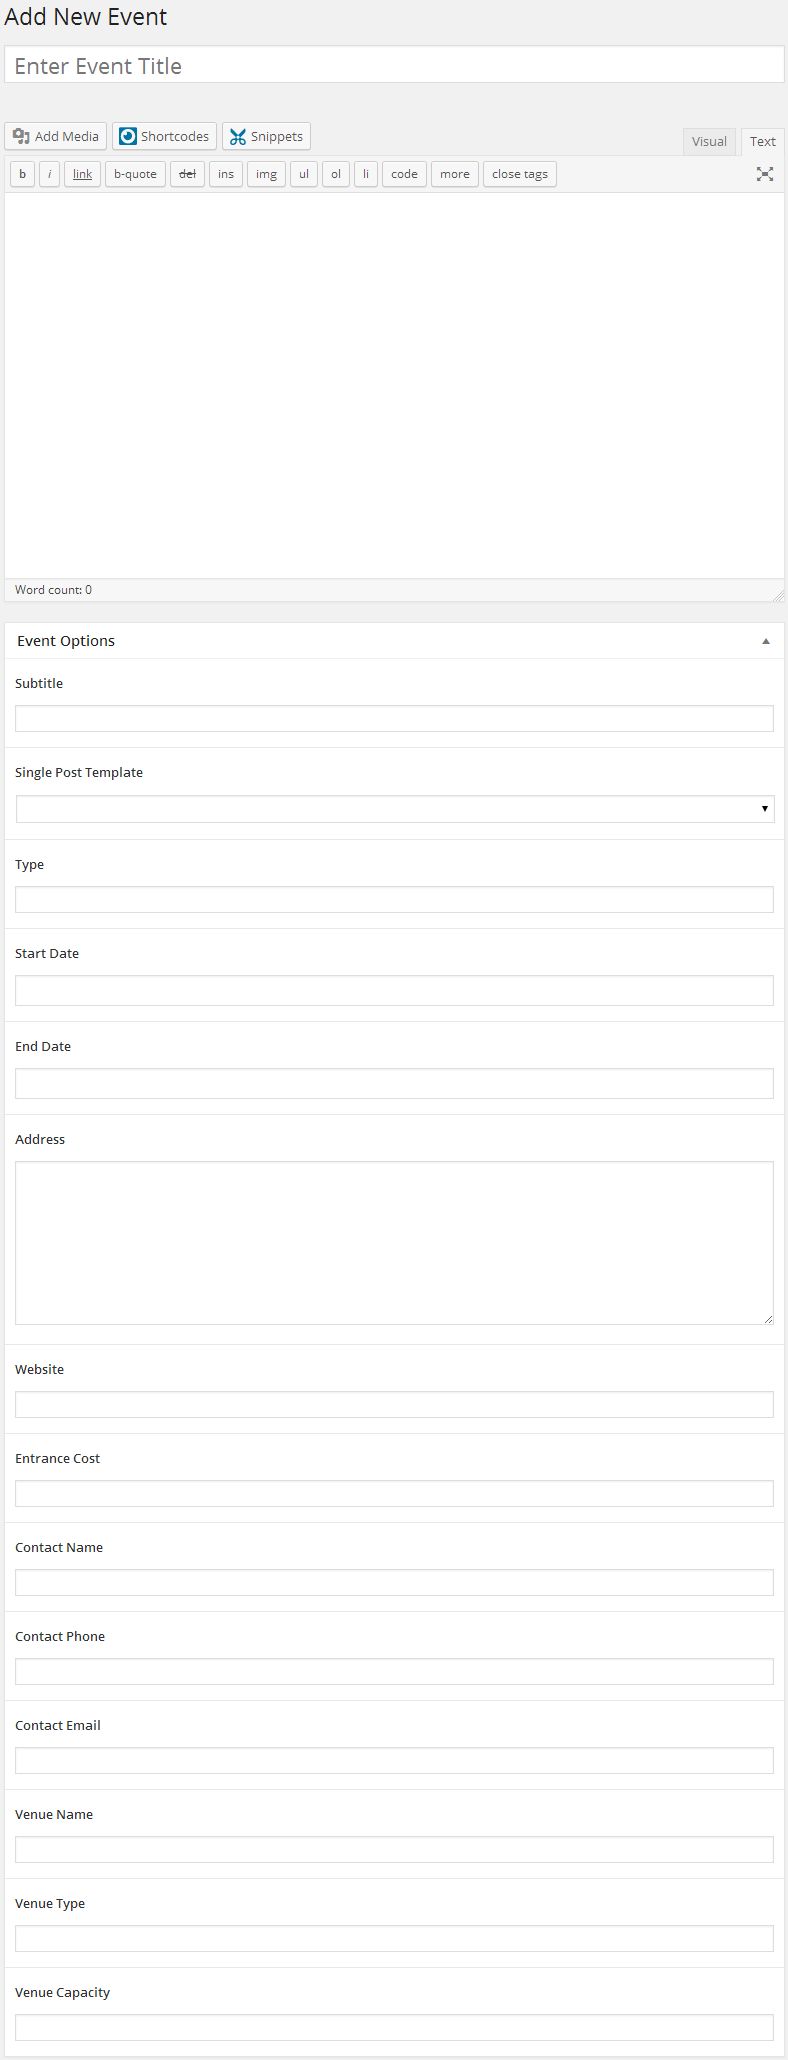
Event Options
FAQ Custom Post Type

FAQ Options
Jobs Custom Post Type

Job Options
Locations Custom Post Type
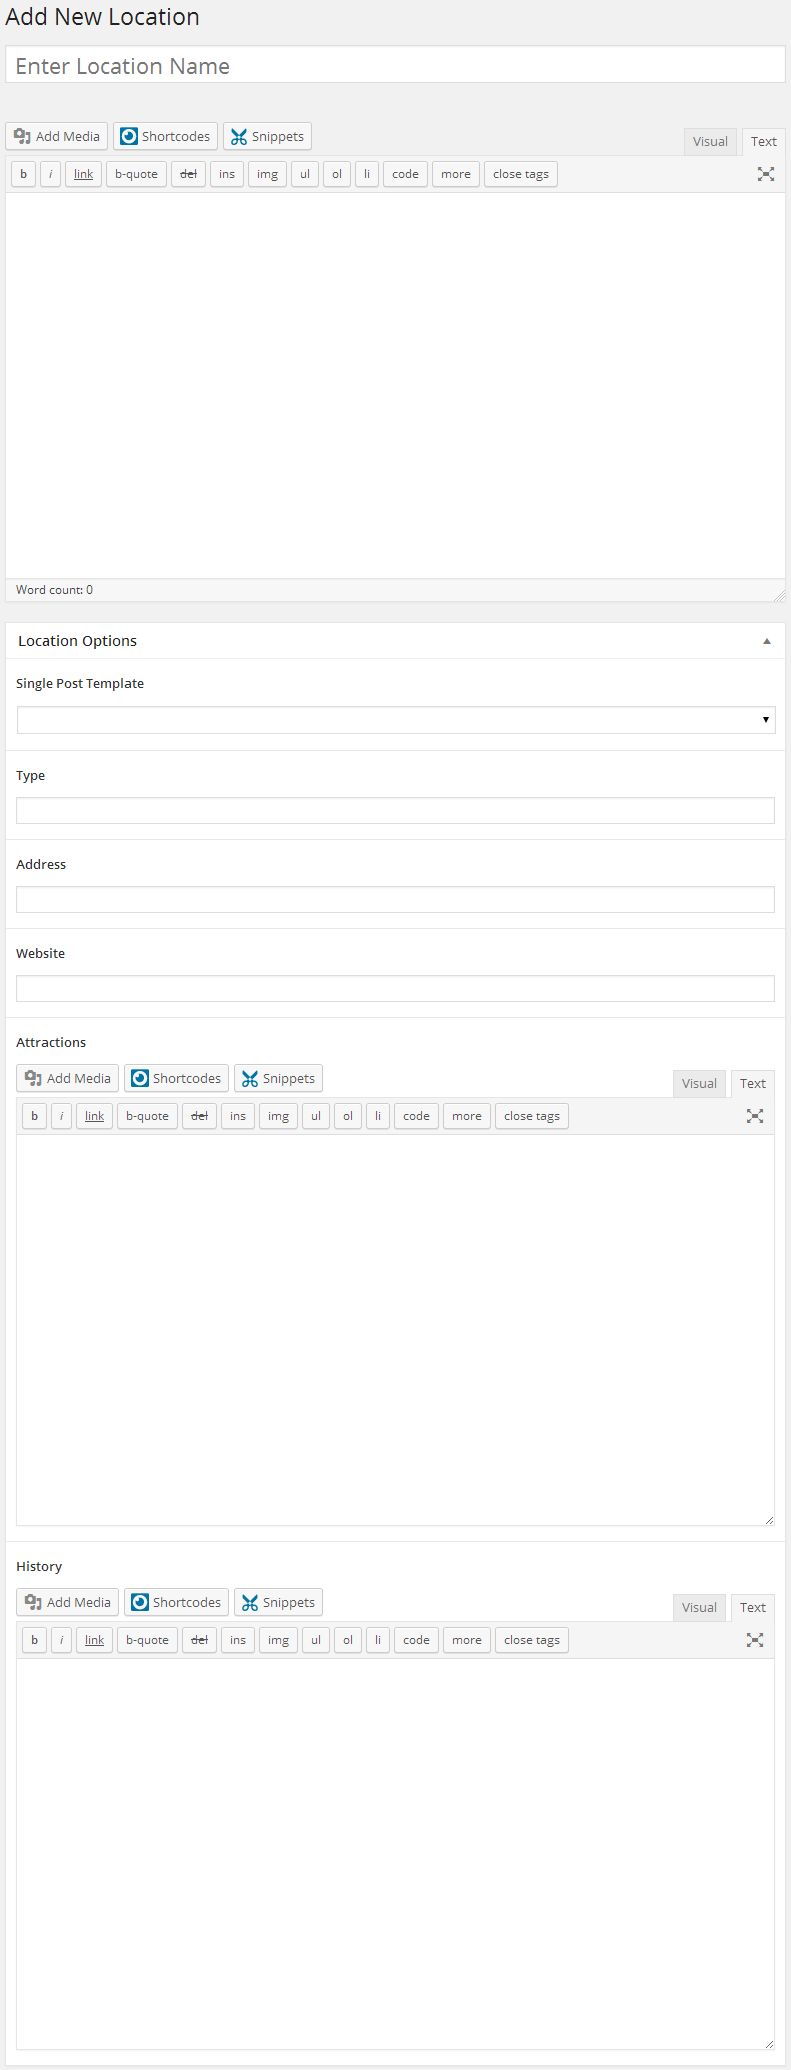
Location Options
Movies Custom Post Type
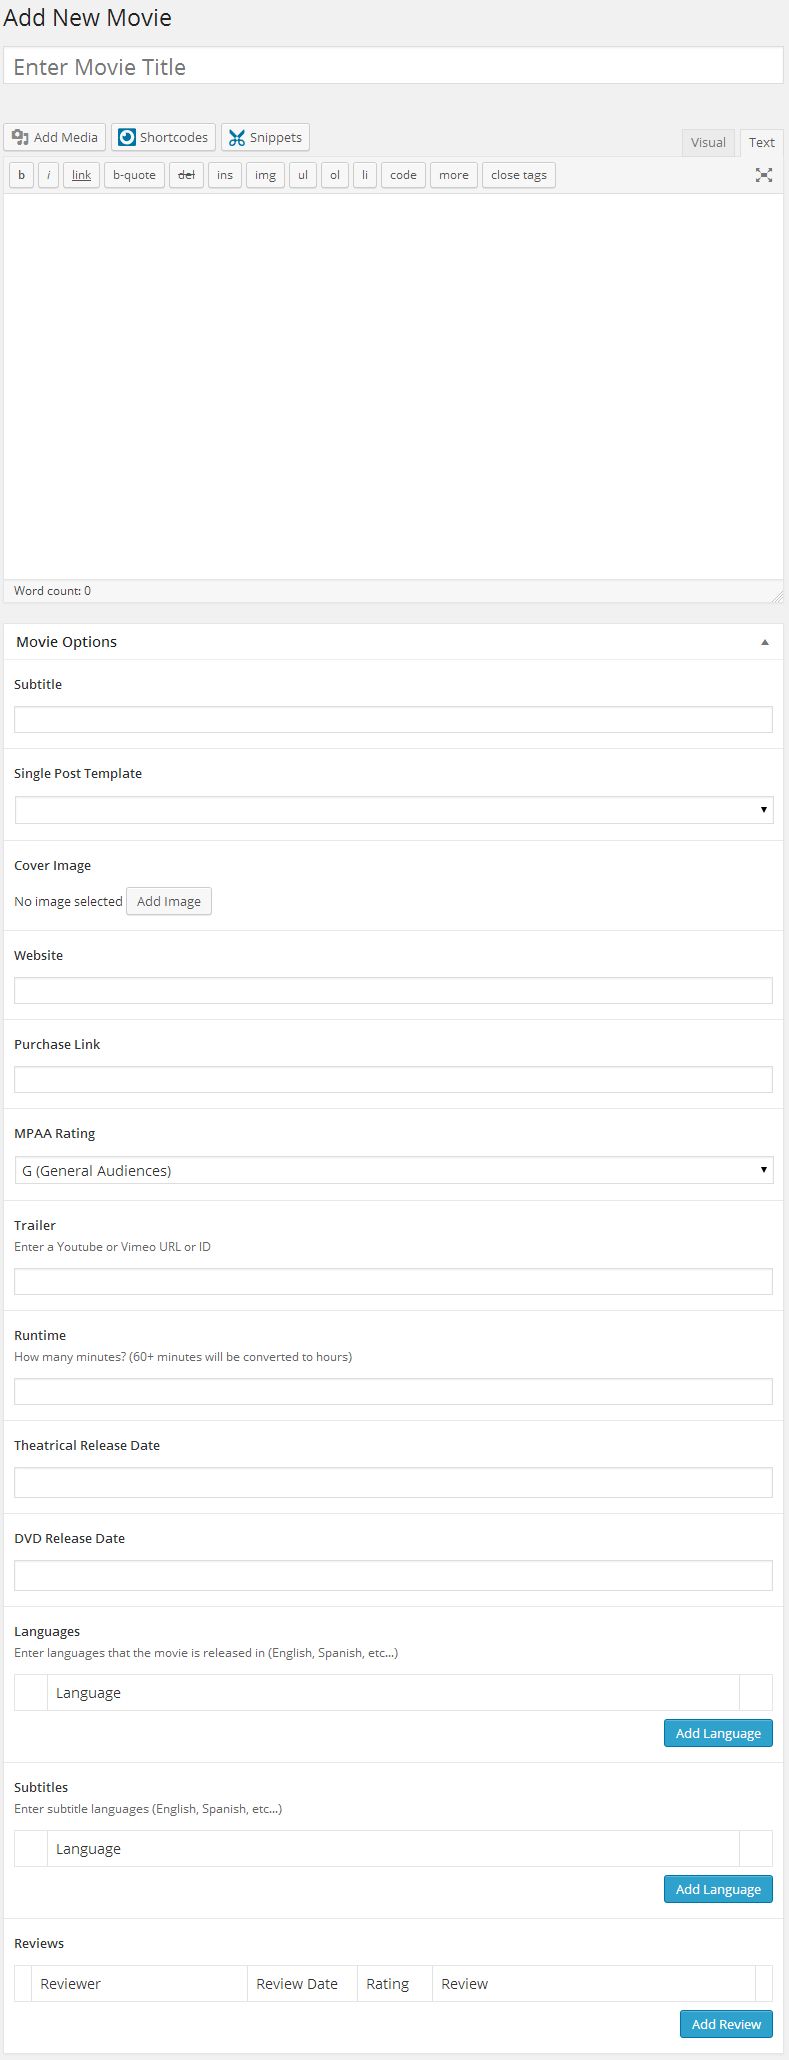
Movie Options
Music Custom Post Type

Music Options
Tracks Options
News Custom Post Type
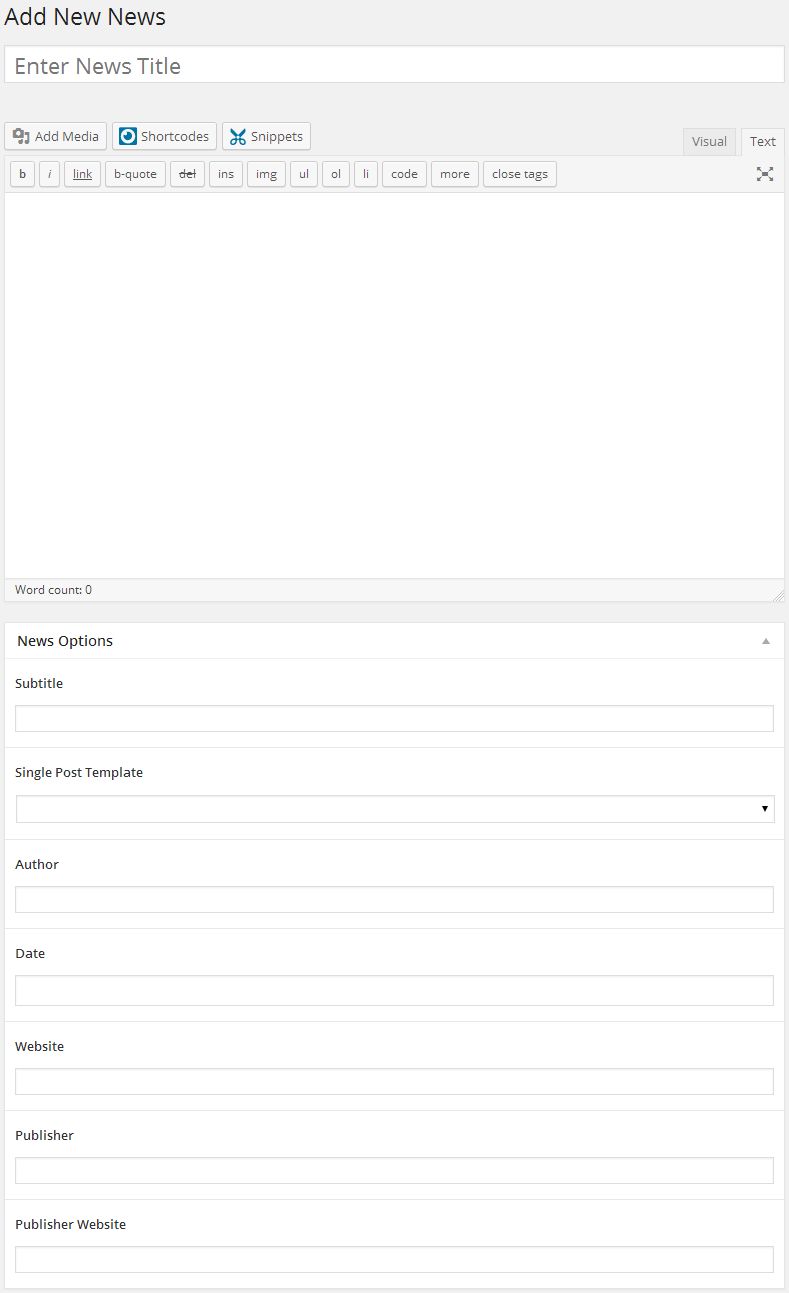
News Options
Portfolio Custom Post Type
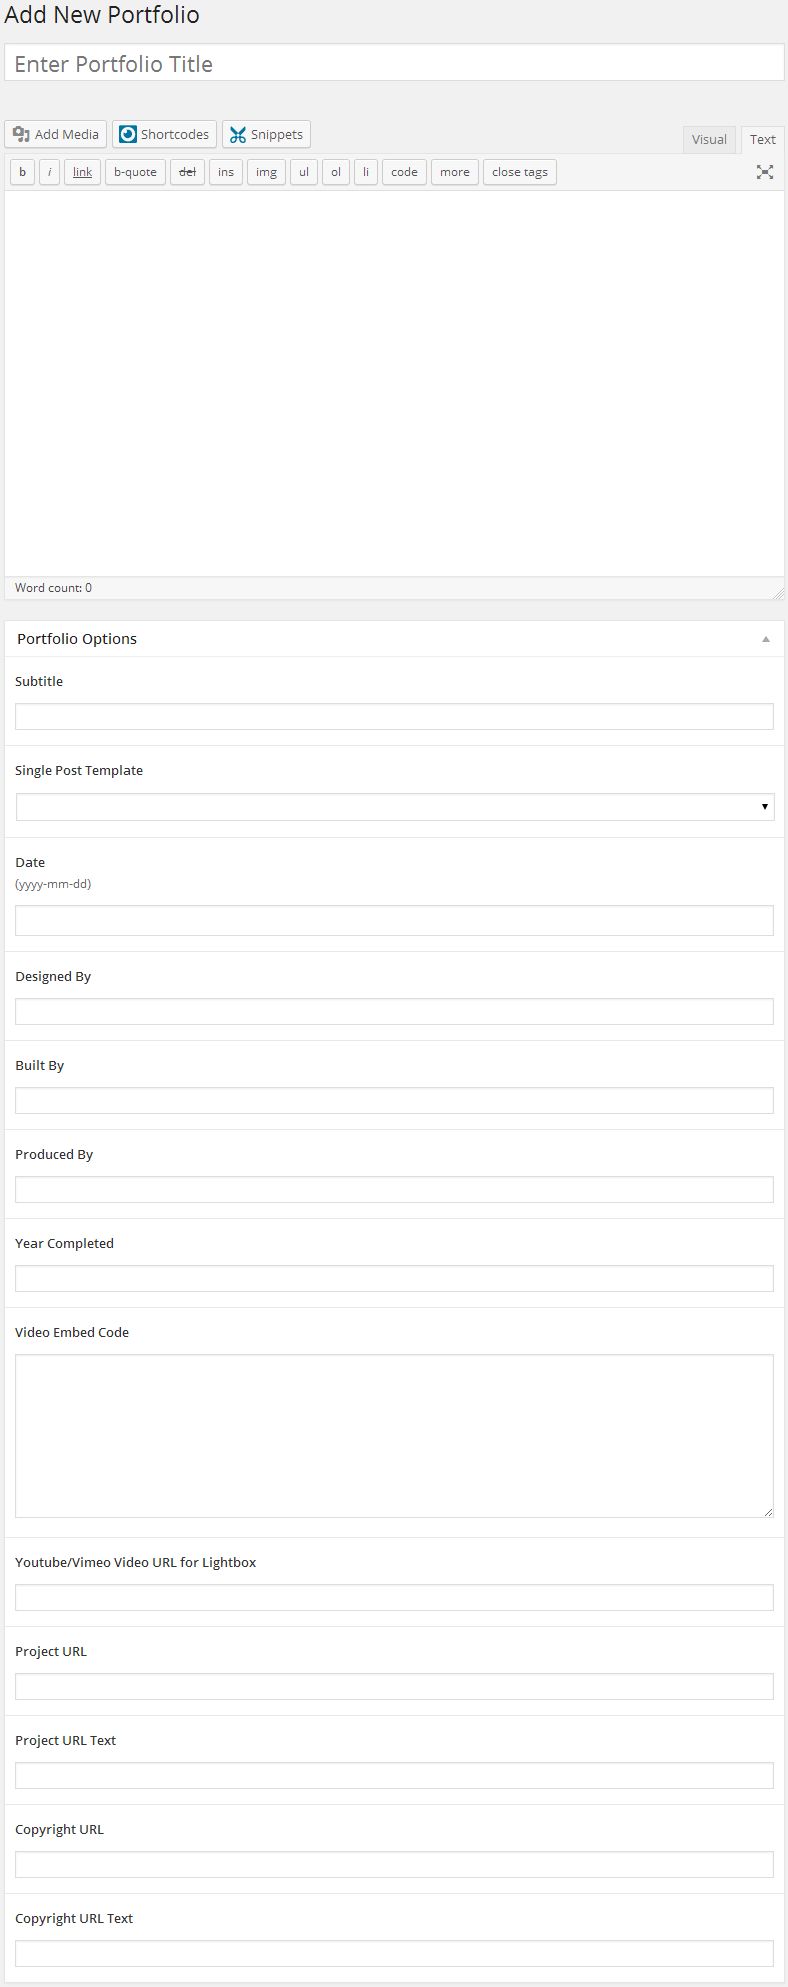
Portfolio Options
Quotes Custom Post Type
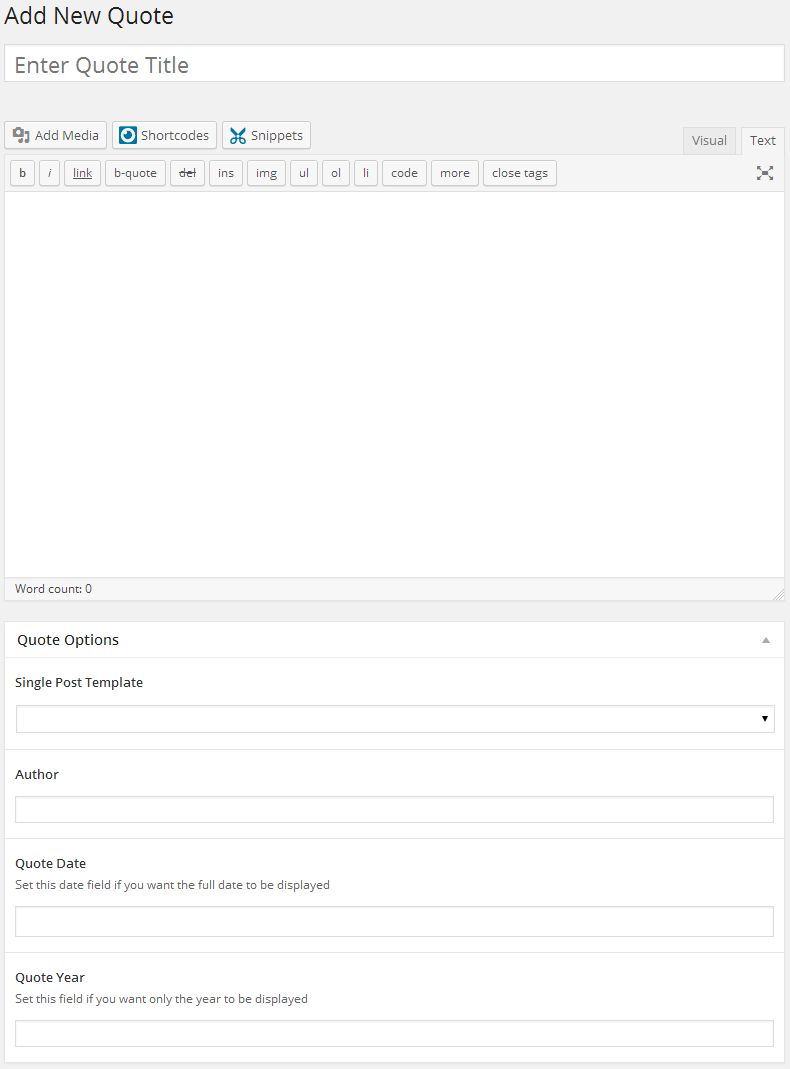
Quote Options
Recipes Custom Post Type
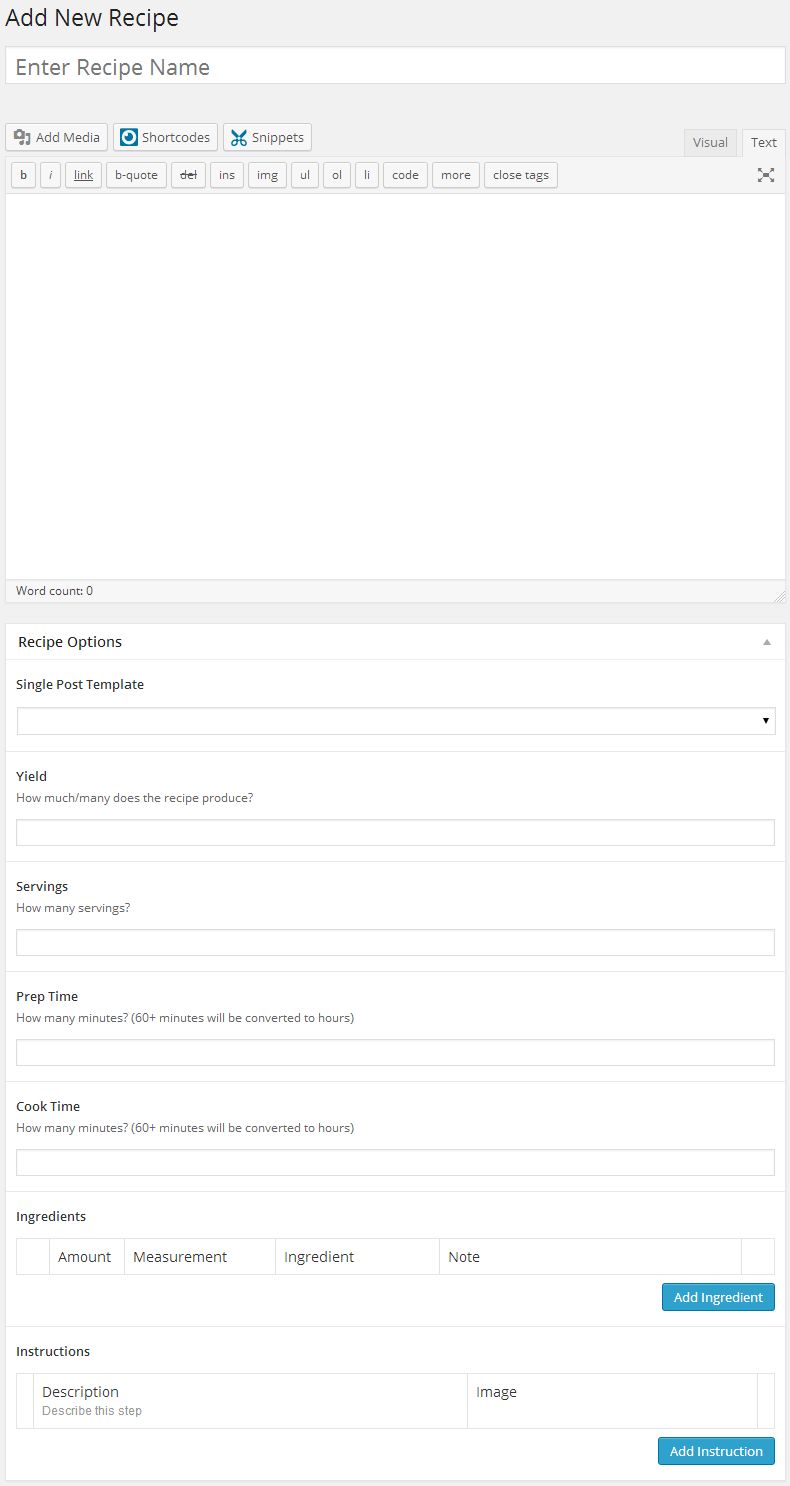
Quote Options
Snippets Custom Post Type
Enter your snippet into the content area, just as you would a page or post.
The Snippets custom post type does not have any metabox options.
Team Custom Post Type
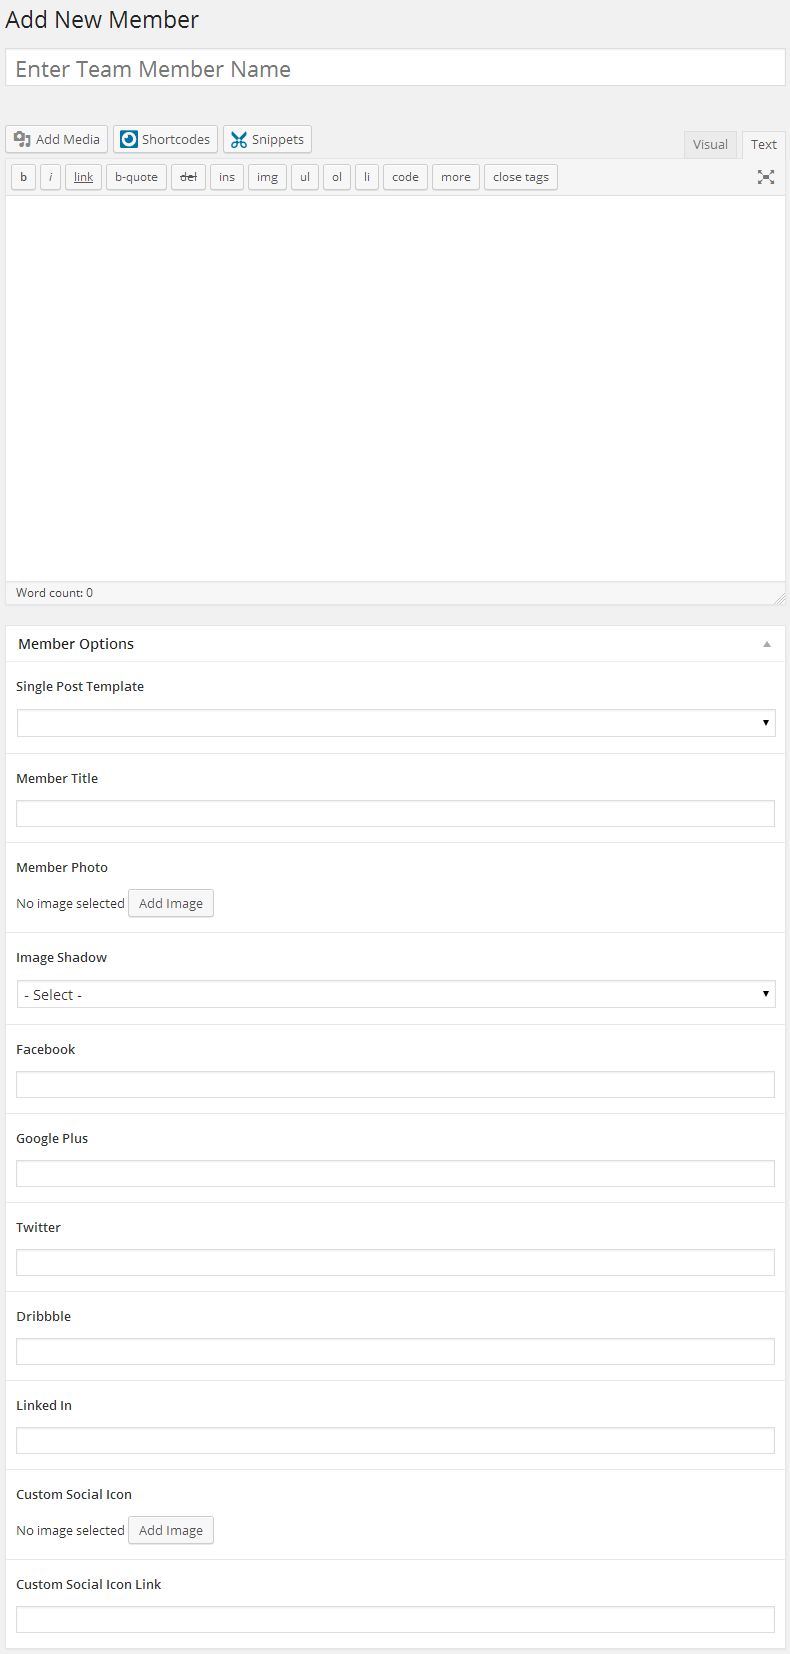
Member Options
Templates Custom Post Type
You can create templates that are used for the single post page or you can create templates that are for showing items in a list. When showing your items in a list, you get to chose from a one, two, three, four, or six column layout. This gives you a lot of flexibility to build your templates the way you want. Have fun, be creative and share your templates with us if you would like.
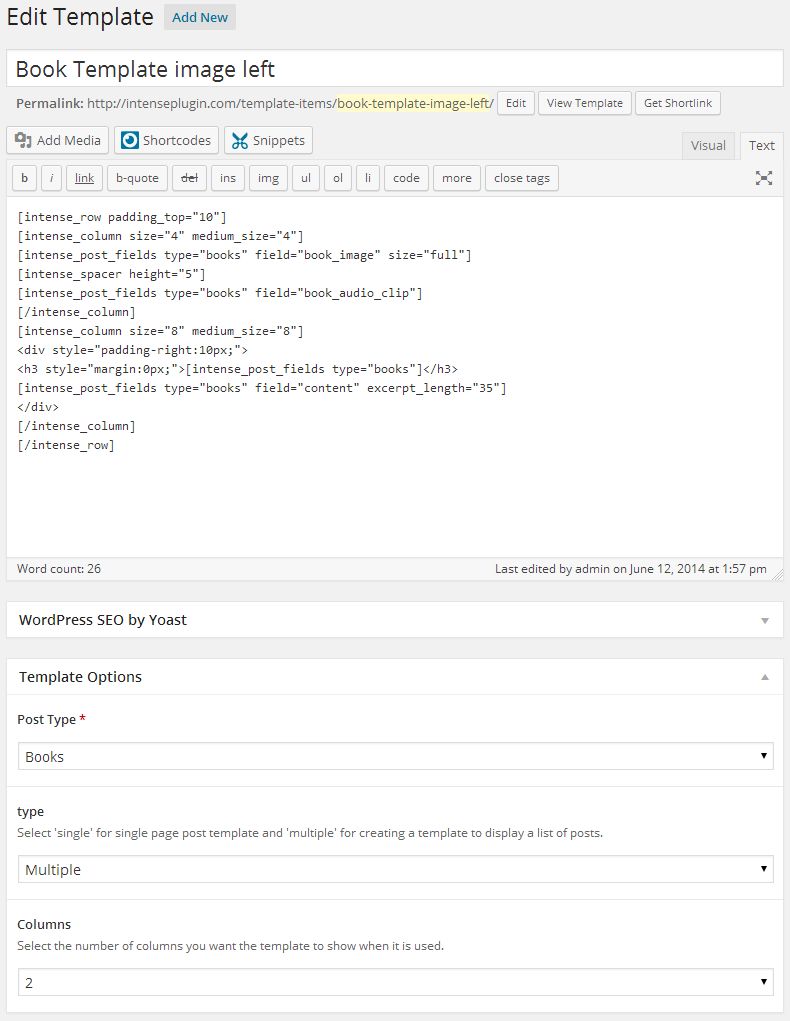 Example of template being used
Template Options
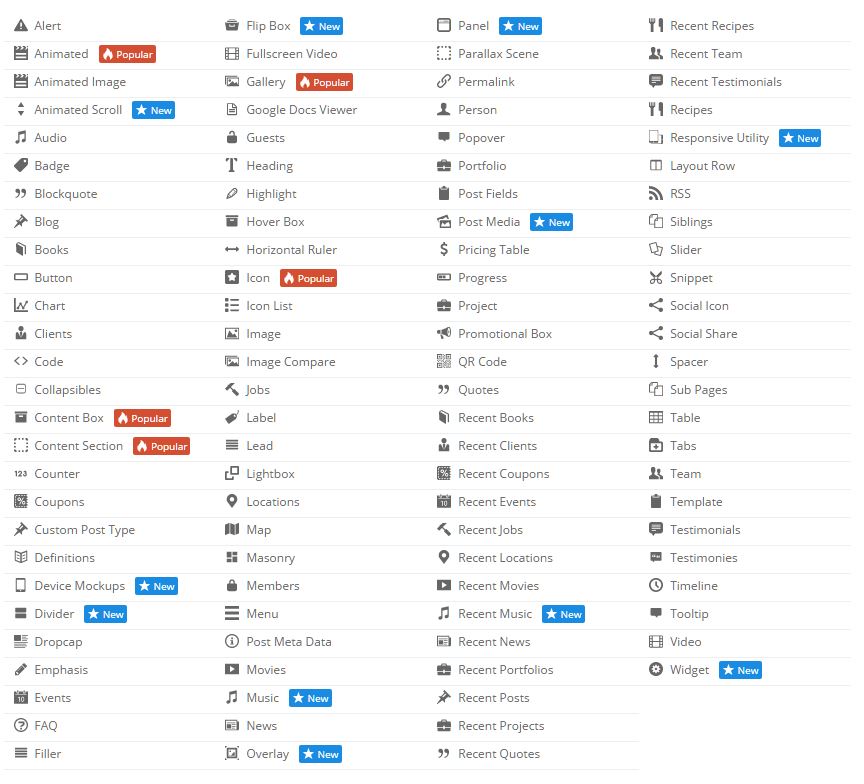
Check out the image to the right to see all of the available shortcodes with Intense.
What Is A Shortcode?
“A shortcode is a WordPress-specific code that lets you do nifty things with very little effort. Shortcodes can embed files or create objects that would normally require lots of complicated, ugly code in just one line. Shortcode = shortcut.” – WordPress.com“Shortcodes in WordPress are little bits of code that allow you to do various things with little effort. They were introduced in WordPress 2.5, and the reason to introduce them was to allow people to execute code inside WordPress posts, pages, and widgets without writing any code directly. This allows you to embed files or create objects that would normally require a lot of code in just one single line.” – wpbeginner.com
How To Use A Shortcode?
A shortcode is wrapped in brackets ([]). Most shortcodes have an opening and a closing shortcode. The opening shortcode will have the brackets surrounding it. The closing shortcode will have the brackets, but will also have a “/” in it as the first character inside of the brackets. Here is an example button shortcode.[intense_button]Button[/intense_button]
Button
Shortcodes will typically have additional options available that allow the user to tailor the result to their liking. If we use the example above and we want to change the size and color of the button and add an icon, the shortcode might look like the following.
[intense_button size=”large” color=”success” icon=”heart”]Button[/intense_button]
Button
Example Shortcodes
//Here is an example of an Animated shortcode that uses an Image shortcode
[intense_animated type=”fadeIn” trigger=”delay” delay=”1500″]
[intense_image imageid=”9739″ size=”square75″ /]
[/intense_animated]
//Here are a few examples of Button shortcodes
[intense_button gradient=”1″ border_radius=”2″ color=”muted”]Gradient[/intense_button]
[intense_button size=”large” color=”success” icon=”heart”]Icon Left[/intense_button]
[intense_button size=”large” color=”primary” border_radius=”5″]Radius 5px[/intense_button]//Here is an example of an Alert shortcode
[intense_alert]
This is a standard alert.
[/intense_alert]What Are Intense Snippets?
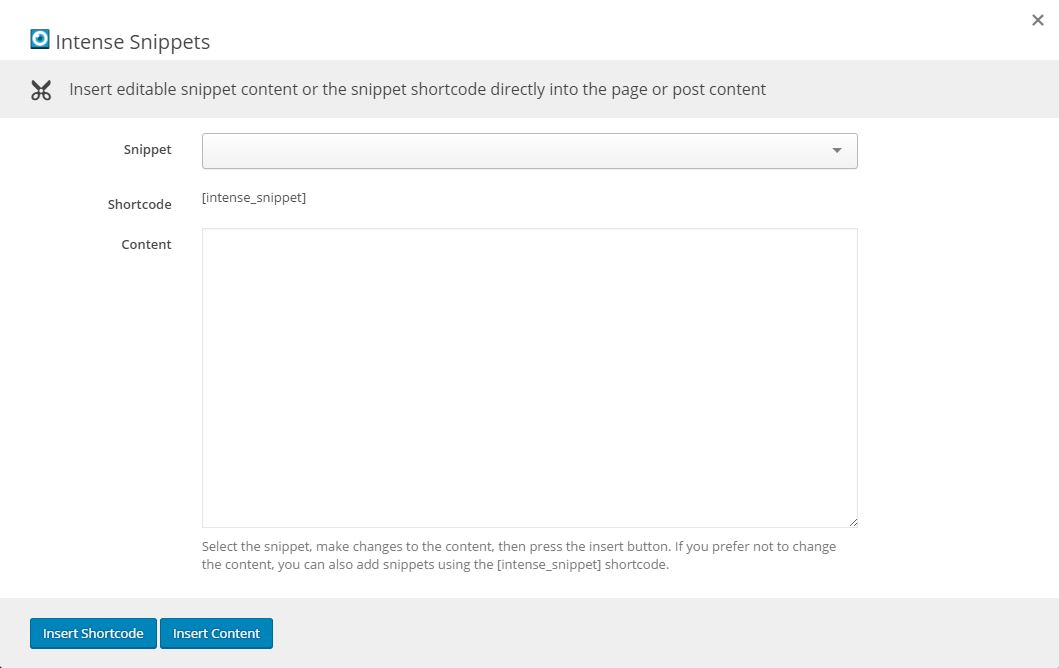
Intense snippets are bits of content that can be reused on pages and posts. They can be added using the snippet shortcode or the content can be placed directly on the page using the snippet button. *Click on the image to see what the Snippets dialog looks like.
Snippets can be added/updated/removed from the WordPress admin pages or saved as files on disk.
Where Are They?
Intense snippets can exist in four different locations:- Saved within WordPress – these snippets are added/updated/and removed via the WordPress admin pages. They are saved within the WordPress database.
- The plugin – in the
snippetsfolder within the plugin’s main folder. THESE SHOULD NEVER BE CHANGED - The theme – in the
intense_snippetsfolder within the theme’s main folder. - The child theme – in the
intense_snippetsfolder within the child theme’s main folder.
How Do I Change Them?
To change the snippets, copy the folder from the download to your child theme’s or theme’s main folder. At that point, you can edit the files and the plugin will use your edited version instead of the default version.Can I Add My Own?
One way to add snippets is through the snippets admin page. You can add snippets like you would any regular post or page. You can add your own snippet files within the snippet folders. The file should include a header in the following format:
<?php
/*
Intense Snippet Name: [YOUR SNIPPET NAME HERE]
*/Snippets Custom Post Type
If you are looking for information on the Snippets Custom Post Type, please look in the Custom Post Types or click here.Which Snippets Are Available By Default?
By default, we have included snippets for our example pages. The library of snippets will continue to grow to include more snippets to help you more quickly build your site.What Are Intense Templates?
Intense templates allow you to override the layout of a shortcode. If you don’t like the way the shortcode looks, you can change the html markup to suit your needs. Not all shortcodes are templated but most of the shortcodes with a lot of html are. If you are happy with the default look, there is no need to change the templates.Where Are They?
Intense templates can exist in three different locations:- The Intense plugin – in the
templatesfolder within the plugin’s main folder. THESE SHOULD NEVER BE CHANGED - The theme – in the
intensefolder within the theme’s main folder. - The child theme – in the
intensefolder within the child theme’s main folder.
The plugin will look for templates in the following order: the child theme, the theme, the plugin.
The download for this plugin includes a folder intense_templates which is a copy of the default templates found in the plugin folder.
How Do I Change Them?
To change the templates, copy the folder from the download to your child theme’s or theme’s main folder. At that point, you can edit the files and the plugin will use your edited version instead of the default version.Can I Add My Own?
One way to add templates is through the templates admin page. You can add templates like you would any regular post or page. To do this, you will need to use the Post Fields shortcode. This shortcode allows you to add the fields to be displayed in the template. When the template is run, the shortcodes will know to find the appropriate fields for each post. *Click the above image to view an example template setup to be used for the Book Custom Post Type.
You can add your own template file within the template folders. The file should include a header in the following format:
<?php
/*
Intense Template Name: [YOUR TEMPLATE NAME HERE]
*/
Templates Custom Post Type
If you are looking for information on the Templates Custom Post Type, please look in the Custom Post Types or click here.What If I Need to Upgrade My Theme?
When you upgrade the Intensity theme, it is best to backup the template folder to a safe location. After upgrading, put your template files back into the theme from your backup. We strongly suggest using a child theme so that you do not have to worry about the templates folder being overwritten and your changes being lost.Which Templates Are Available By Default?
Nearly all of the Custom Post Types that are included in Intense have templates available by default. You can also template metadata (author, date, and comments shown for posts in intense post shortcodes), pricing tables, recent posts, and testimonies to name a few.Intensity includes a bunch of additional templates for the above mentioned Custom Post Types as well as a number of additional template-able items. These additional items include the header, footer, title bar, search, secondary header, and secondary footer. Intensity includes a number of templates for these items already, but we make it easy for you to add your own, or modify one of our existing ones.
Some Additional Information About Templates
[intense_custom_post] (including [intense_blog] & [intense_portfolio])The templates for this shortcode are found under the custom-post directory. Standard post templates are under the post directory within the custom-post directory. Portfolio templates are found under the intense_portfolio directory. If you want to add your own templates for custom post types, create a directory under the custom-post directory with a name that matches the custom post type name. If there aren’t templates for a given custom post type, the default post templates will be used. The list below shows only some of the included templates that are available with the Intensity theme and the Intense plugin.
NOTE: Timeline templates must have timeline in their file name.
templates
|-custom-post
|–intense_portfolio
|—–four_text.php
|—–one.php
|—–one_text_left.php
|—–one_text_right.php
|—–three_text.php
|—–timeline.php
|—–timeline_text_left.php
|—–timeline_text_only.php
|—–timeline_text_right.php
|—–two_text.php
|–post
|—–four.php
|—–four_text.php
|—–one.php
|—–one_text_left.php
|—–one_text_right.php
|—–three.php
|—–three_text.php
|—–timeline.php
|—–timeline_text_left.php
|—–timeline_text_only.php
|—–timeline_text_right.php
|—–two.php
|—–two_text.php
|–some_other_custom_post_type
|—–your_own_template.php
The following data is available to the custom post templates:
global $post, $intense_custom_post;
———
$intense_custom_post
(
    [plugin_layout_style] => the padding and margin styles defined in the plugin options
    [cancel_plugin_layout_style] => 0 margin and padding used to cancel out plugin layout style
    [template] => template name
    [categories] => comma separated list of categories
    [post_type] => the post type to show
    [taxonomy] => the taxonomy of the posts
    [posts_per_page] => number of posts to show on a single page
    [image_shadow] => shadow to show on the post featured image
    [hover_effect] => hover effect of the featured image
    [show_all] => show all posts
    [show_filter] => show filter at top of post list
    [show_images] => show featured images
    [show_missing_image] => show missing image if no featured image has been set
    [timeline_mode] => timeline mode: center, left, right, dual
    [timeline_order] => order to the timeline events: asc, desc
    [timeline_showyear] => show the year separator
    [timeline_readmore] => text for read more link
    [timeline_color] => color of the timeline event
    [filter_easing] => easing when items filtered
    [filter_effects] => easing effect for filtered items
    [hover_effect_color] => color for image hover
    [hover_effect_opacity] => opacity for image hover
    [sticky_mode] => how to show sticky posts: top, inline, ignore
    [post_image_shadow] => defined in meta box
    [hovereffect] => defined in meta box
    [hovereffectcolor] => defined in meta box
    [hovereffectopacity] => defined in meta box
    [index] => index number of post in loop
    [edit_link] =>  html markup for post edit link
    [post_classes] => extra classes used for filtering and item setup
    [rtl] => rtl mode setting
)- Posts – Post Options and Featured Media
- Books – Post Options only
- Clients – Post Options and Featured Media
- Coupons – Post Options and Featured Media
- Events – Post Options and Featured Media
- FAQ – Post Options only
- Jobs – Post Options only
- Locations – Post Options and Featured Media
- Movies – Post Options only
- Music – Post Options only
- News – Post Options and Featured Media
- Portfolio – Post Options and Featured Media
- Projects – Post Options and Featured Media
- Quotes – Post Options only
- Recipes – Post Options and Featured Media
- Team – Post Options and Featured Media
- Testimonials – Post Options only
See the settings below that are available for both the above mentioned Post Options and Featured Media meta options.

