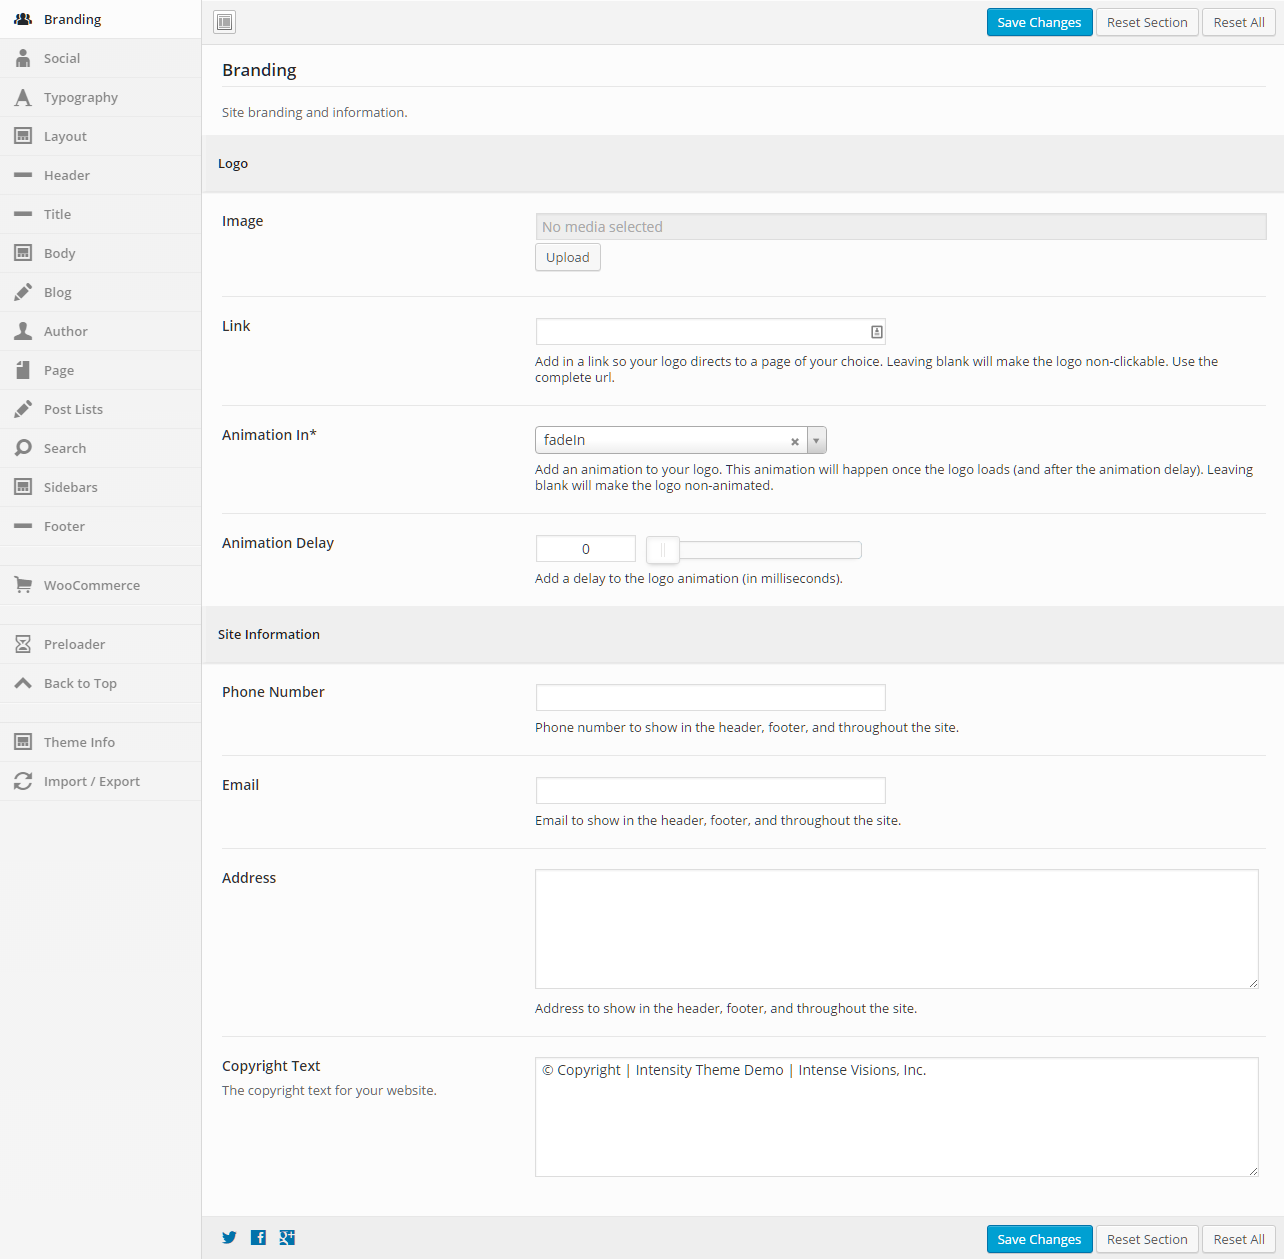
Branding

This section allows you to set your logo and other personal/company information to be used throughout your site. This information may display in the header, footer, widgets, or throughout the site.

Logo

Image
Upload the image that will be used as your logo.
Link
Add in a link so your logo directs to a page of your choice. Leaving blank will make the logo non-clickable. Use the complete url.
Animation In
Add an animation to your logo. This animation will happen once the logo loads (and after the animation delay). Leaving blank will make the logo non-animated.
Animation Delay
Add a delay to the logo animation (in milliseconds).

Site Information

Phone Number
Phone number to show in the header, footer, and throughout the site.
Email
Add in a link so your logo directs to a page of your choice. Leaving blank will make the logo non-Email to show in the header, footer, and throughout the site.
Address
Address to show in the header, footer, and throughout the site.
Copyright Text
The copyright text for your website, typically shown in the footer.

Demos

Please note that the ZipArchive extension must be installed and activated on your server for the demos to import correctly.
Install and activate the following plugins: Intense*, SMK Sidebar Generator*, LayerSlider, Slider Revolution, and WooCommerce. (*required)
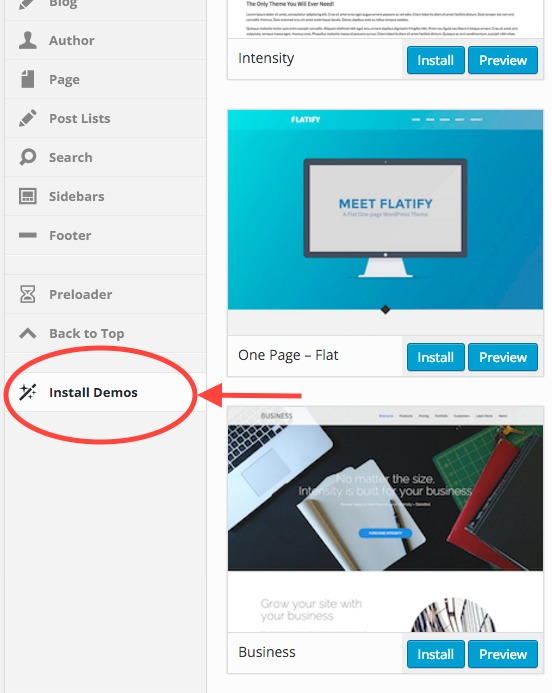
Navigate to the Intensity Install Demos page.
Find the demo you wish to install and click Install to start importing the demo.
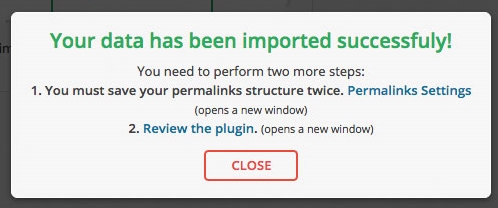
Wait for the installation to finish. It may take several minutes depending on the demo and connection speed. When complete, you will see a prompt telling you the demo has been imported.
Common Issues

Sorry, something unexpected occurred during installation.

This error is most likely due to your server environment settings. Typically the server execution time limit is too low or there isn’t enough memory available. Ask your host to increase the PHP max_execution_time and/or the memory_limit settings.

Duplicate Demo Content.

If you import the demo data more than once, there are a few things that may be duplicated. For the most part, this duplicate data can easily be cleaned up manually. To do so, locate the duplicate content and delete it from the system. For example, if you have multiple duplicated menu items, you would edit the menu and manually remove the items.

If you want to completely start over, you can use one of the following plugins:

Alternate Installation Method

WARNING: Installing the demos using the alternate method will entirely reset your database.
We have provided this alternate method to install the demos for those that are running into issues. At times, server configurations prevent the standard method from working. If you are having issues, installing the demos using the alternate method provides a good alternative.

Install and activate the theme and required plugins: Intense*, SMK Sidebar Generator*, LayerSlider, Slider Revolution, and WooCommerce. (*required)
Install and activate the All-in-One WP Migration plugin.
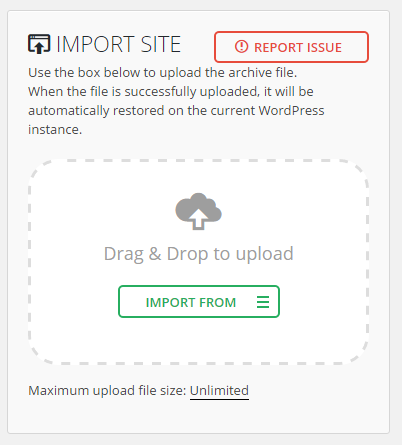
Navigate to the All-in-One WP Migration Import page.
Click the Import From button and select the demo file you have downloaded (see below for download links). You can also drag and drop the file within the upload box.
The file will be uploaded to your server and processed. Once done, you will see a prompt warning you about your database being overwritten. When ready, click the Continue button.
Wait for the installation to finish. When done, you will see a message letting you know that the import completed successfully. Click the Close button.
After the installation has finished, you will be logged out and will need to log back into the website. You will not be able to log back in with the users that you initially set up since the database has been reset. Use the following username and password to log in:

Username: admin Password: admin

After logging in, you can change the username and password to something more secure.
Alternate Demo Installation Downloads

Sidebars

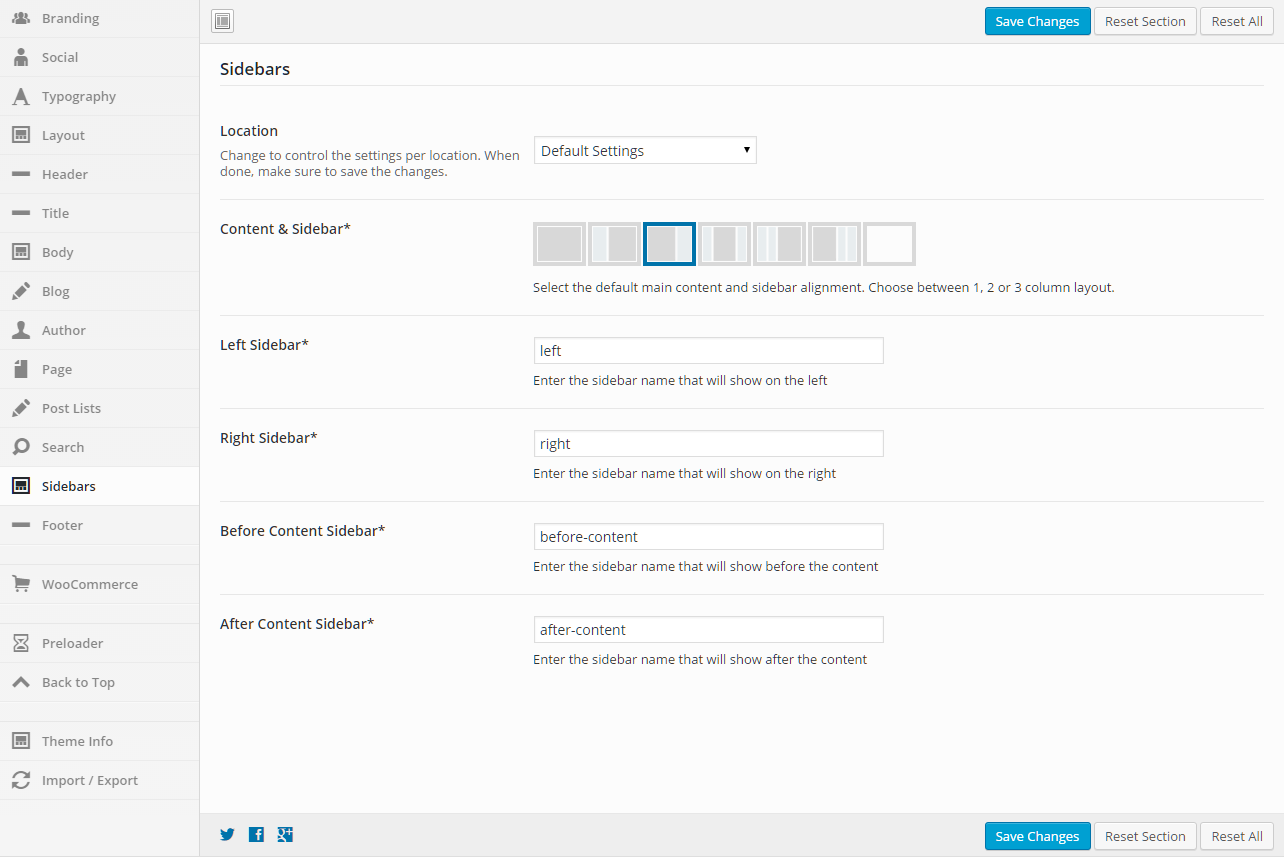
This section gives you the ability to control the sidebars for the post type and post type archive pages. The sidebar settings can be applied to all different post types and their archive pages.

General

Location
Change to control the settings per location. When done, make sure to save the changes. The settings below this dropdown will apply to the location that is chosen.
Content & Sidebar
Select the default main content and sidebar alignment. Choose between 1, 2 or 3 column layout.
Left Sidebar
Enter the sidebar name that will show on the left.
Right Sidebar
Enter the sidebar name that will show on the right.
Before Content Sidebar
Enter the sidebar name that will show before the content.
After Content Sidebar
Enter the sidebar name that will show after the content.

Page

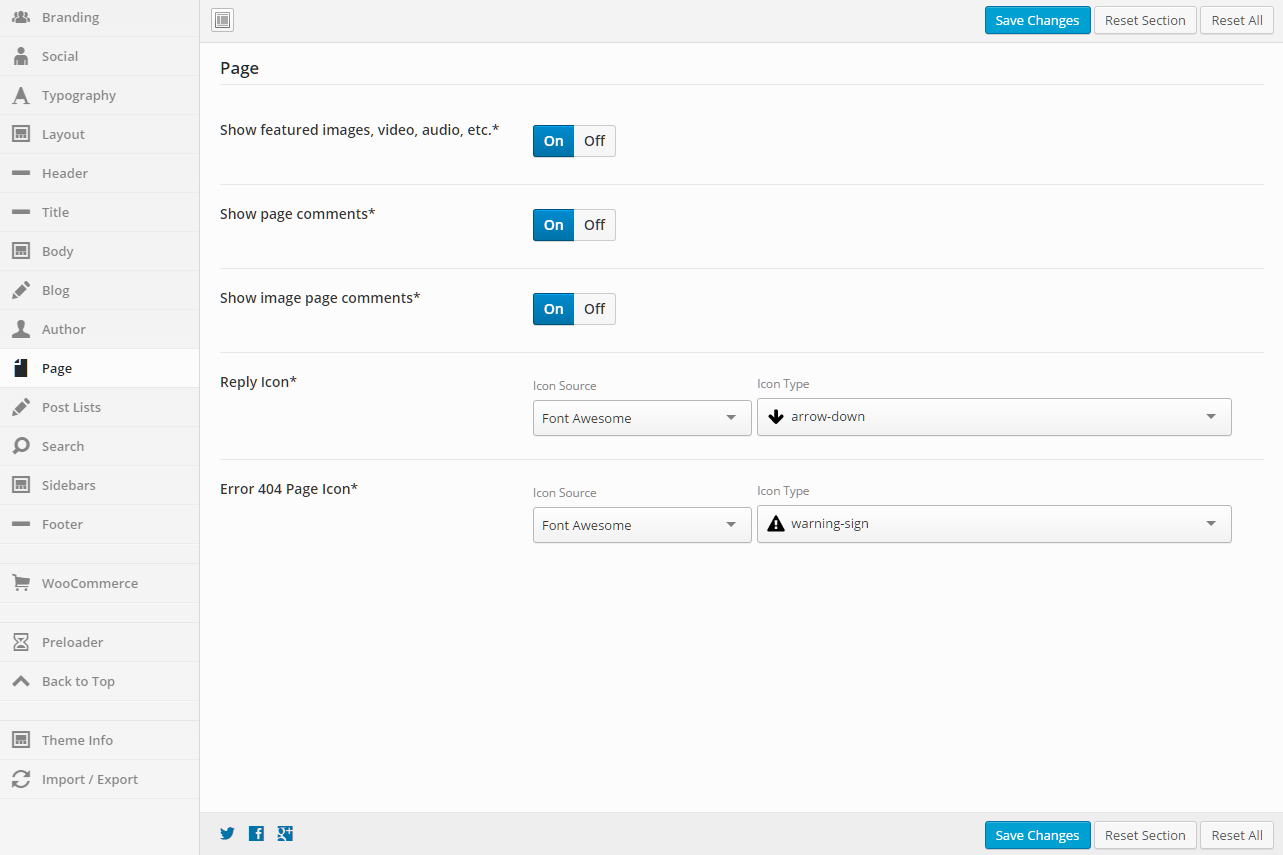
This section gives you the ability to control page options.

General

Show Featured Images, Video, Audio, etc.
Set this option to “On” if you want the featured items to show, and “Off” if you do not want them to show.
Show Page Comments
Set this option to “On” if you want the page comments to show, and “Off” if you do not want them to show.
Show Image Page Comments
Set this option to “On” if you want the image page comments to show, and “Off” if you do not want them to show.
Reply Icon
Set the icon that you want to be used. You can select from a number of icon sources. Select an Icon Source, then the Icon Type will be populated. The default is to use the Font Awesome “arrow-down” icon.
Error 404 Page Icon
Set the icon that you want to be used. You can select from a number of icon sources. Select an Icon Source, then the Icon Type will be populated. The default is to use the Font Awesome “warning-sign” icon.

Footer

This section gives you the ability to control nearly all things related to the footer. You can choose the layout of the footer, the template that is being used, and color and border options.

General

Widget Heading Color
Set the widget heading color.

Primary Footer

Show
Turn this option On to show the primary footer and turn it Off to not show the primary footer. This value can be overridden at the page or post level.
Layout
Full or boxed width for footer content
Full width allows the content to extend the entire browser width. With full width, content sections can be used to box the content. If you want the content to always be boxed, then choose boxed.
Template
This option allows you to select a template for the footer. There are a number of templates included with Intensity, but you can also create your own. See Creating Content > Templates for more information.
Template Sections
Check each of the sections that you want to show in the footer. Not all the sections may apply to all the footer templates.
Padding
Top – Set this option to add a top padding (measured in pixels)
Right- Set this option to add a right padding (measured in pixels)
Bottom – Set this option to add a bottom padding (measured in pixels)
Left – Set this option to add a left padding (measured in pixels)
Columns
Set the number of columns you want the footer to be. This may not apply to all the footer templates.
Background
This option allows the control of the header background. You can set the color, transparency, repeat, size, attachment, position, and image for the background of the header. More information on these settings can be found here.
Top Border
Set the different values for the border: the height in pixels, the type of border (solid, dotted, etc…), and the color
Bottom Border
Set the different values for the border: the height in pixels, the type of border (solid, dotted, etc…), and the color
Opacity
Set the opacity for the footer. Default is 100 (0 is completely transparent, 100 is solid).

Secondary Footer

Show
Turn this option On to show the secondary footer and turn it Off to not show the secondary footer. This value can be overridden at the page or post level.
Template
This option allows you to select a template for the secondary footer. There are a number of templates included with Intensity, but you can also create your own. See Creating Content > Templates for more information.
Layout
Full or boxed width for footer content
Full width allows the content to extend the entire browser width. With full width, content sections can be used to box the content. If you want the content to always be boxed, then choose boxed.
Background
This option allows the control of the header background. You can set the color, transparency, repeat, size, attachment, position, and image for the background of the header. More information on these settings can be found here.
Top Border
Set the different values for the border: the height in pixels, the type of border (solid, dotted, etc…), and the color
Bottom Border
Set the different values for the border: the height in pixels, the type of border (solid, dotted, etc…), and the color
Padding
Top – Set this option to add a top padding (measured in pixels)
Right- Set this option to add a right padding (measured in pixels)
Bottom – Set this option to add a bottom padding (measured in pixels)
Left – Set this option to add a left padding (measured in pixels)
Opacity
Set the opacity for the secondary footer. Default is 100 (0 is completely transparent, 100 is solid).

Search

This section gives you the ability to set the post types that will be returned in the search results and also the icon that will be used (default is a magnifying glass).

General

Search Results Post Types
The type of posts to show in the search results
Mark all of the post types that you want to show in the search results.
Icon
Set the icon to be used for the search. This icon is shown next to the menu in many of the Intensity header templates.
Select an Icon Source, then the Icon Type will be populated.

Post Lists

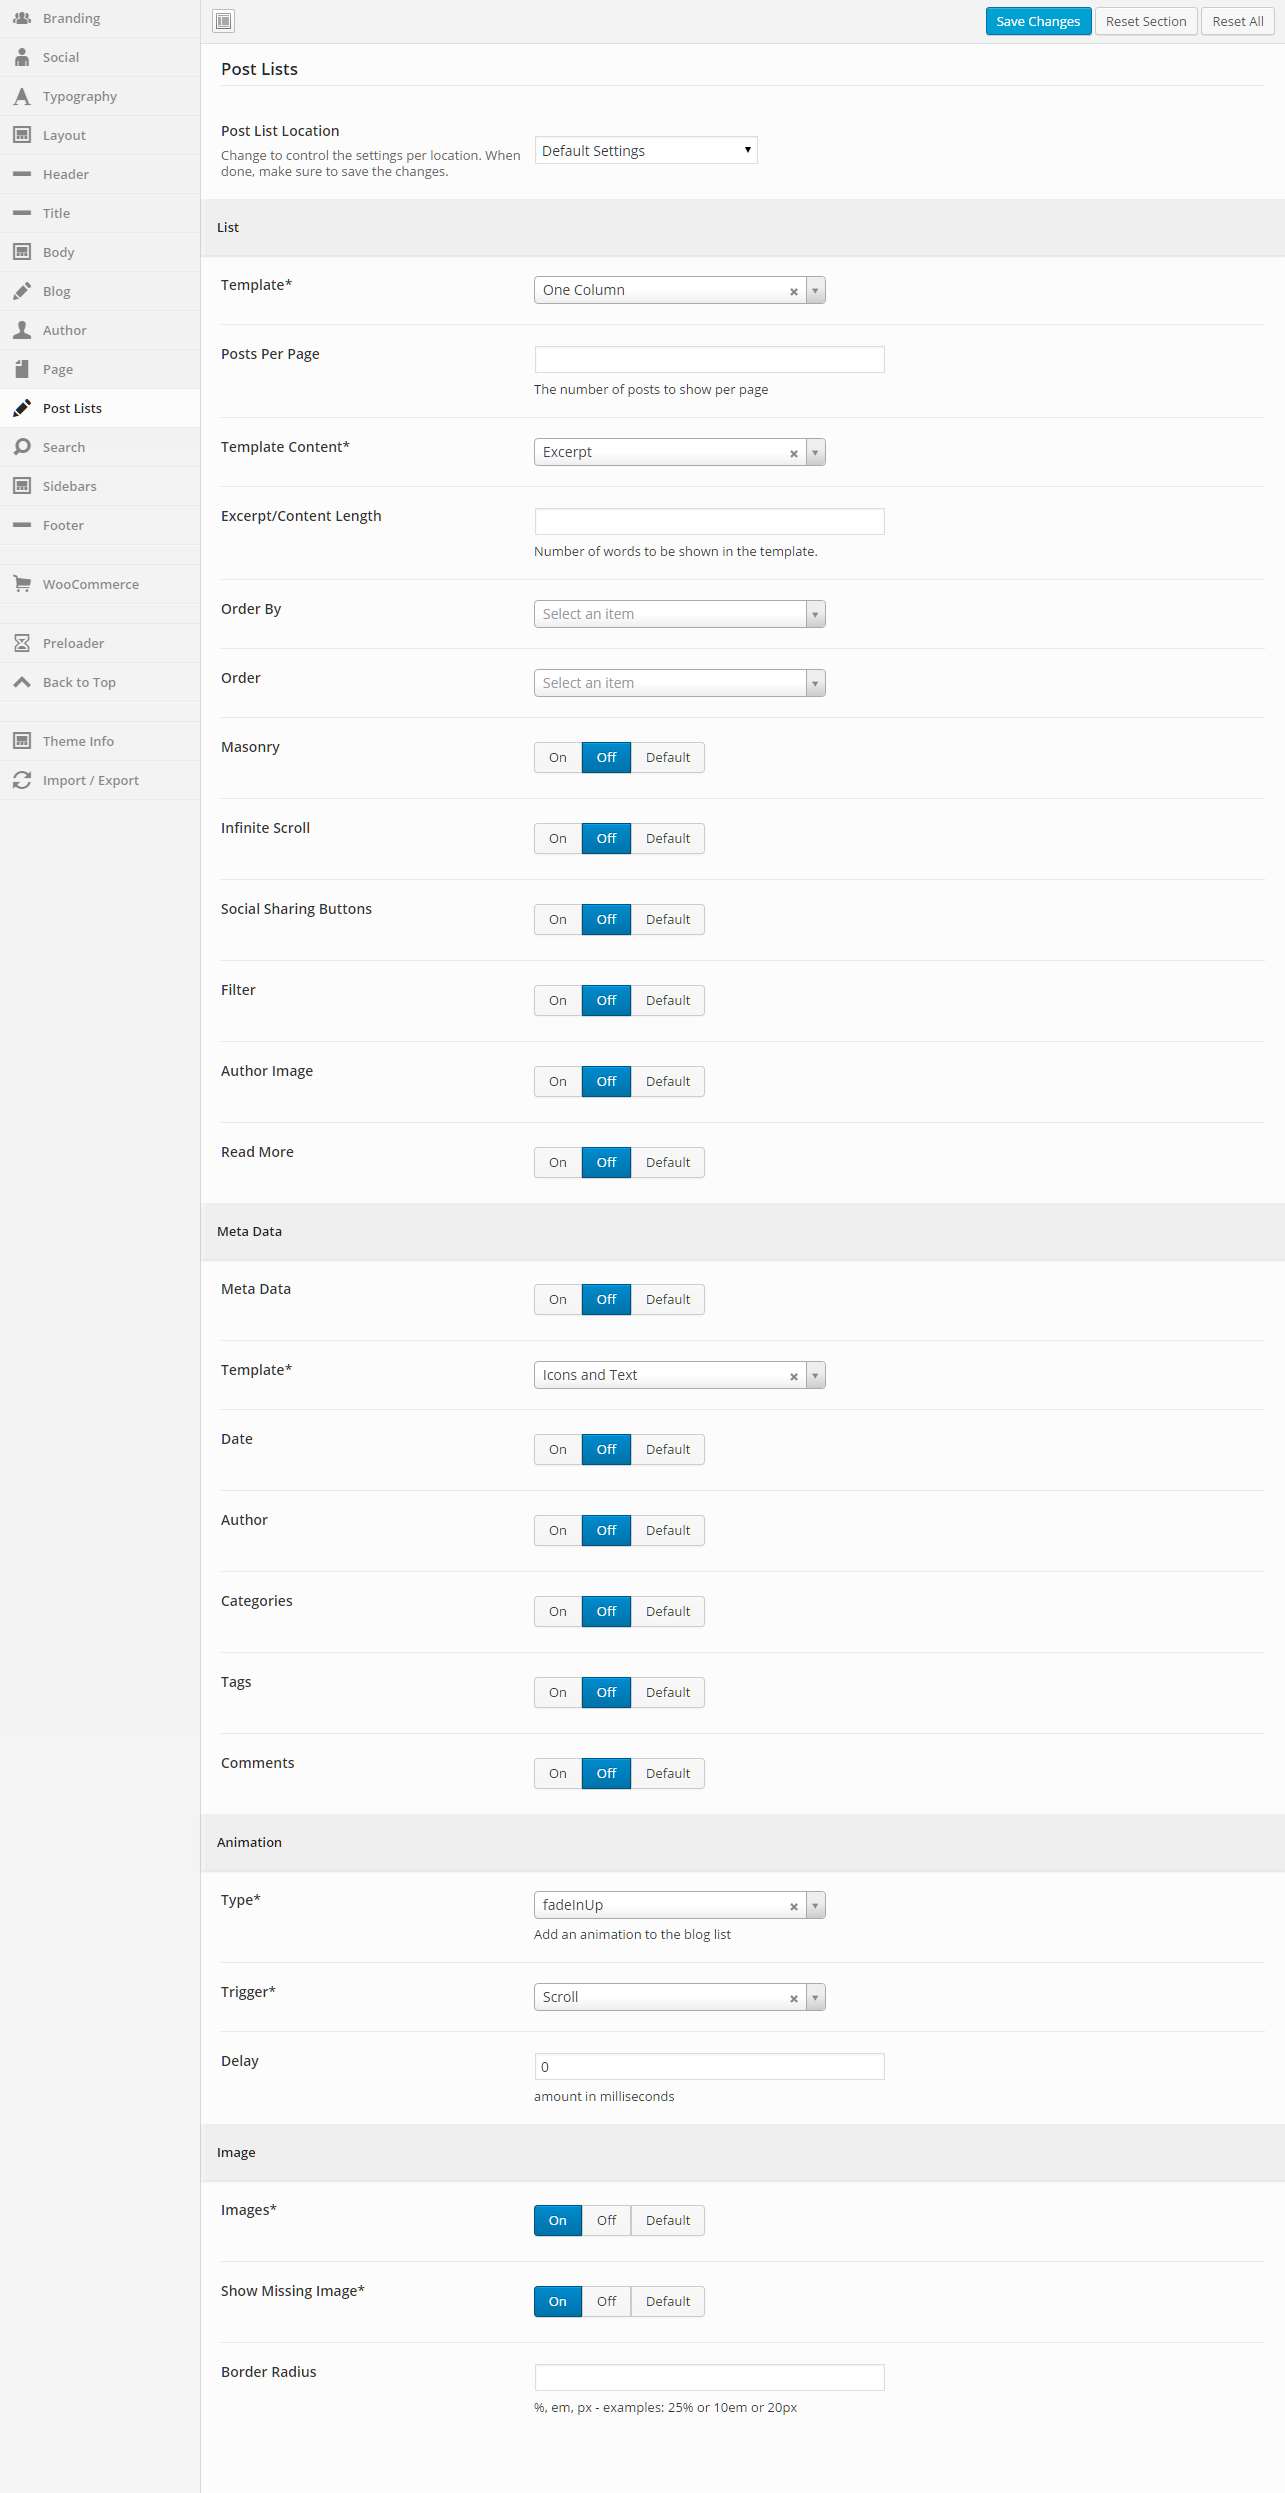
This section gives you the ability to control how post lists are shown for all the various post types and their archive pages as well.

General

Post List Location
Change to control the settings per location. When done, make sure to save the changes. The settings below this dropdown will apply to the post list location that is chosen.

List

Template
This option allows you to select a template for the meta data. There are a number of templates included with Intensity, but you can also create your own. See Creating Content > Templates for more information.
Posts Per Page
Set the number of posts to show per page.
Template Content
Select what type of content you want to be shown in the template. If you choose “Excerpt” or “Content”, you can set the “Excerpt/Content Length” to limit how much is shown. If you choose “Full Post Content”, the entire post will be shown.
Excerpt/Content Length
Set the number of words to be shown in the template.
Order By
Select what you would like to order the list by (typical setting would be “Post ID”)
Order
Select how you would like to order the post list (typical setting would be “Descending”)
Masonry
Set this to “On” if you want a Masonry layout, “Off” if you do not want a Masonry layout, or “Default” if you want to use the setting stored for this option in the “Default Settings” (this is the option “Default Settings” in the “Post List Location” dropdown).
In finite Scroll
Set this to “On” if you want Infinite Scroll, “Off” if you do not want Infinite Scroll, or “Default” if you want to use the setting stored for this option in the “Default Settings” (this is the option “Default Settings” in the “Post List Location” dropdown).
Social Sharing Buttons
Set this to “On” if you want to show the social sharing buttons, “Off” if you do not want to show the social sharing buttons, or “Default” if you want to use the setting stored for this option in the “Default Settings” (this is the option “Default Settings” in the “Post List Location” dropdown).
Filter
Set this to “On” if you want to show the filter, “Off” if you do not want to show the filter, or “Default” if you want to use the setting stored for this option in the “Default Settings” (this is the option “Default Settings” in the “Post List Location” dropdown).
Author Image
Set this to “On” if you want to show the author image, “Off” if you do not want to show the author image, or “Default” if you want to use the setting stored for this option in the “Default Settings” (this is the option “Default Settings” in the “Post List Location” dropdown).
Read More
Set this to “On” if you want to show the Read More button/link, “Off” if you do not want to show the Read More button/link, or “Default” if you want to use the setting stored for this option in the “Default Settings” (this is the option “Default Settings” in the “Post List Location” dropdown).

Meta Data

Meta Data
Set this to “On” if you want to show the meta data, “Off” if you do not want to show the meta data, or “Default” if you want to use the setting stored for this option in the “Default Settings” (this is the option “Default Settings” in the “Post List Location” dropdown).
Template
This option allows you to select a template for the meta data. There are a number of templates included with Intensity, but you can also create your own. See Creating Content > Templates for more information.
Date
Set this to “On” if you want to show the date, “Off” if you do not want to show the date, or “Default” if you want to use the setting stored for this option in the “Default Settings” (this is the option “Default Settings” in the “Post List Location” dropdown).
Author
Set this to “On” if you want to show the author, “Off” if you do not want to show the author, or “Default” if you want to use the setting stored for this option in the “Default Settings” (this is the option “Default Settings” in the “Post List Location” dropdown).
Categories
Set this to “On” if you want to show the categories, “Off” if you do not want to show the categories, or “Default” if you want to use the setting stored for this option in the “Default Settings” (this is the option “Default Settings” in the “Post List Location” dropdown).
Tags
Set this to “On” if you want to show the tags, “Off” if you do not want to show the tags, or “Default” if you want to use the setting stored for this option in the “Default Settings” (this is the option “Default Settings” in the “Post List Location” dropdown).
Comments
Set this to “On” if you want to show the comments, “Off” if you do not want to show the comments, or “Default” if you want to use the setting stored for this option in the “Default Settings” (this is the option “Default Settings” in the “Post List Location” dropdown).

Animation

Type
Add an animation to the blog list.
Trigger
Select the trigger that will initiate the animation (scroll, hover, click, or delay).
Delay
Set this option if you want to delay the animation. The amount is in milliseconds.

Image

Images
Set this to “On” if you want to show images, “Off” if you do not want to show images, or “Default” if you want to use the setting stored for this option in the “Default Settings” (this is the option “Default Settings” in the “Post List Location” dropdown).
Show Missing Image
Set this to “On” if you want to show the missing image, “Off” if you do not want to show the missing image, or “Default” if you want to use the setting stored for this option in the “Default Settings” (this is the option “Default Settings” in the “Post List Location” dropdown).
Border Radius
Set a value for the border radius of the image (50% will make the image a circle if the image is square).
%, em, px – examples: 25% or 10em or 20px

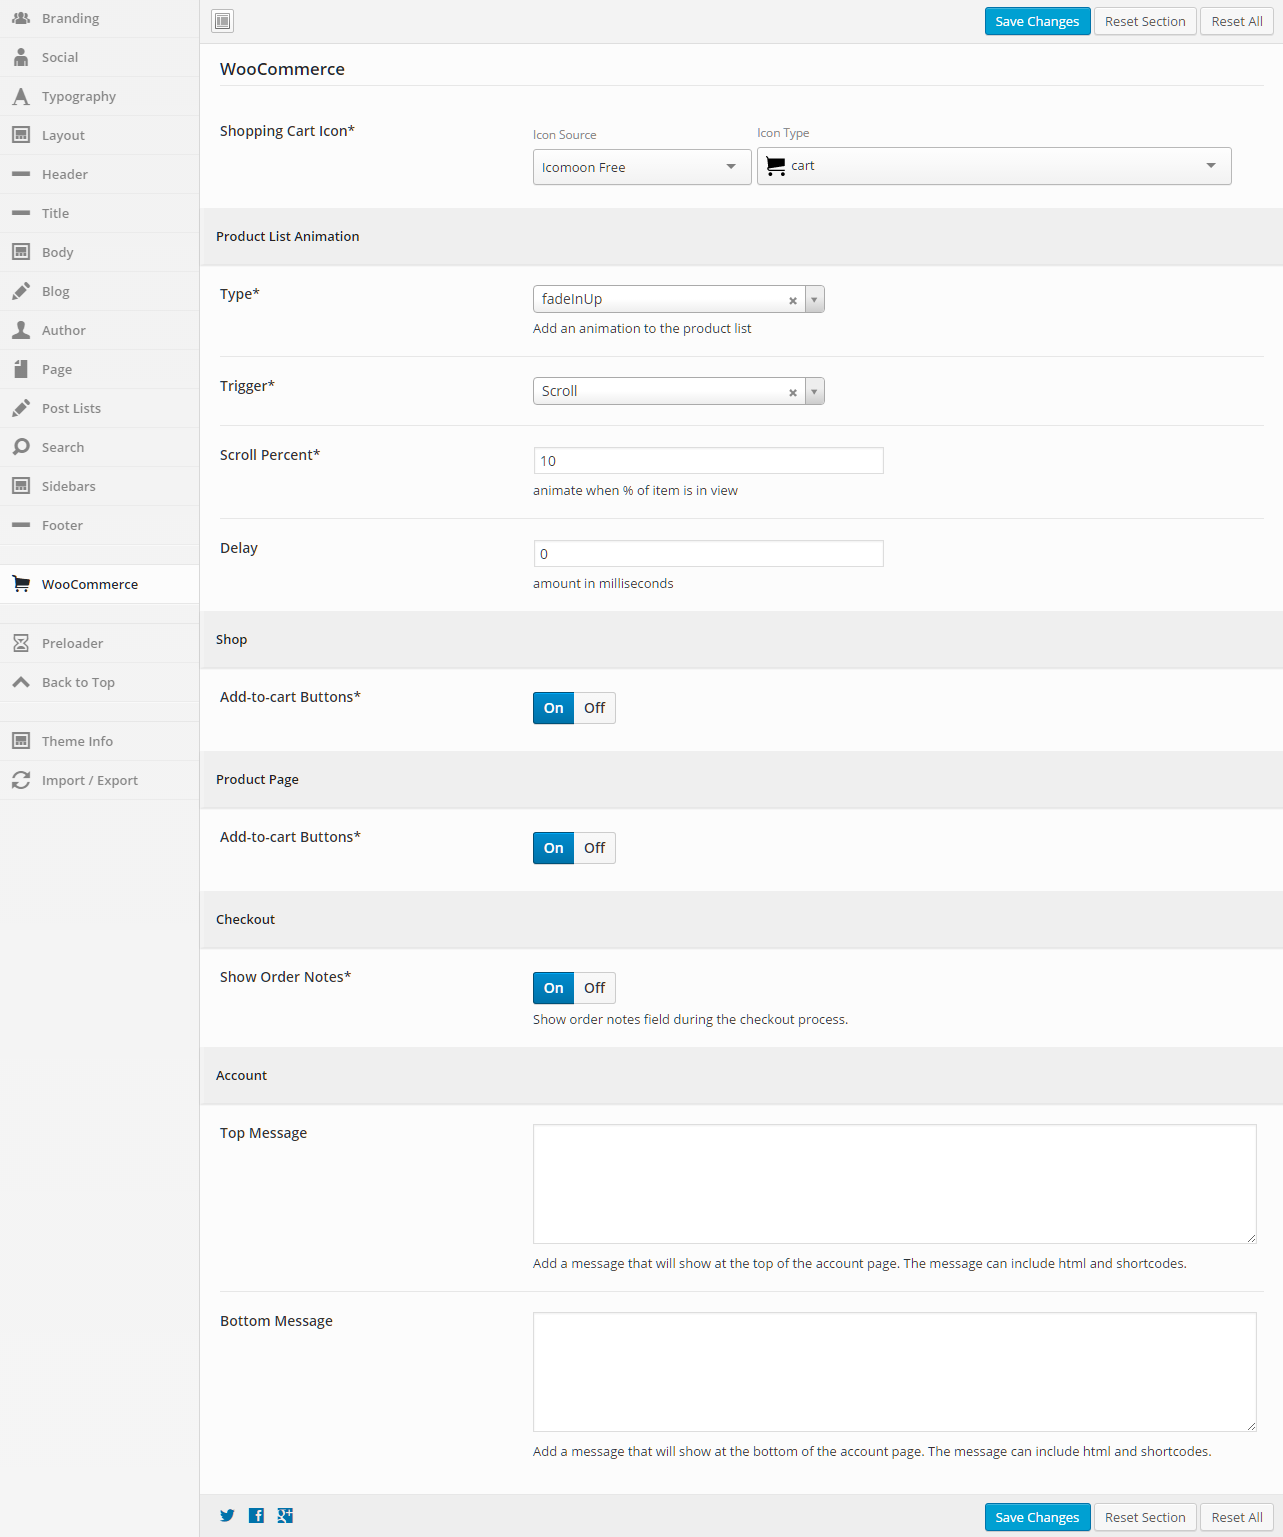
WooCommerce

This section gives you the ability to control different aspects of how Intensity displays WooCommerce products.

General

Shopping Cart Icon
Set the icon to be used for the WooCommerce shopping cart.
Select an Icon Source, then the Icon Type will be populated.

Product List Animation

Type
Add an animation to the product list.
Trigger
Select the trigger that will initiate the animation (scroll, hover, click, or delay).
Scroll Percent
When this percent of the product is in view, the product will animate. This option is only available if “Scroll” is selected for the Trigger.
Delay
Set this option if you want to delay the animation. The amount is in milliseconds.

Shop

Add-to-cart Buttons
Set this field to “On” to show Add-to-cart buttons on shop page.

Product Page

Add-to-cart Buttons
Set this field to “On” to show an Add-to-cart button on product pages.

Checkout

Show Order Notes
Set this field to “On” to show order notes field during the checkout process.

Account

Top Message
Add a message that will show at the top of the account page. The message can include html and shortcodes.
Bottom Message
Add a message that will show at the bottom of the account page. The message can include html and shortcodes.

Installing WordPress

Intensity requires a working version of WordPress – which can be installed in multiple ways. Check with your hosting provider to make sure you meet the minimum requirements. Often hosting providers will have tools that make installing WordPress a matter of just a few clicks. Check with your hosting company to see if this is an option available to you. If you are looking for hosting, check out our list of recommended hosting companies.

If you need help installing WordPress, there are step-by-step instructions found within the WordPress Codex.

The following video created by Woo Themes walks through the installation process.

Requirements

The Intensity theme is made to work with WordPress 3.5 or newer, PHP 5.6 or newer, and MySQL 5 or newer. However, we recommend you follow the requirements listed for WordPress.

PHP Configuration

Many issues can be caused by PHP configuration settings that are too low. Issues such as: having problems uploading or installing files, experiencing a white screen when trying to access your site, mysteriously losing menu items when editing large menus, etc. can all be related to PHP configuration settings.

Recommended Settings
max_execution_time180
memory_limit128M
post_max_size32M
upload_max_filesize32M

If you are unsure how to change these settings yourself, your hosting company can help. You can see what your current settings are by using the following plugin:

https://wordpress.org/plugins/wordpress-php-info/